
How to set up Databricks on Azure
Setting up an Azure Databricks instance with sufficient security config and hands on example of various ways of moving loading data

The Mid Engineer here, I mostly write about Data Engineering, but I also write about other engineering topics from time to time.
Here is a place where I share my knowledge and learnings.
Not subscribe yet?
Recently, I explored Azure Databricks for a PoC project with machine learning workload.
Let's begin with my learning journey.
Setting Up Configurations
1 - Installation
Here, we are installing the azure cli, databricks cli and azcopy.
azcopy is a fasat and scalable solutionn to move data across cloud storages.
brew update && brew install azure-cli

brew install azcopy

brew install databricks

pip install databricks-cli
2 - Authentication
az login

azcopy login
To check relevant info about our account and the cli,
az account list-locations -o table

az account set --subscription <subscription-id>

az --version
To move data across cloud storage, say for example, from Google Cloud Storage to Azure Blob, we will need a GCP service account with sufficient storage priviledge and export creds.json locally.
For more details, check here
export GOOGLE_APPLICATION_CREDENTIALS=/your/file/path/gcp-creds.jsonFile Cloning with AZCOPY
Following the Azure doc, I then clone data across cloud storage
azcopy copy 'https://storage.cloud.google.com/<bucket-name>' 'https://<storage-account>.blob.core.windows.net/<container-name>' --recursive=trueAfter data transferred, we can check the blob objects via -
az storage blob list --account-name <storage-account> --container-name <container-name> --output tableTo bulk delete files under a folder
#!/bin/bash

RESOURCE_GROUP="grp-name"

ACCOUNT_NAME="acc-name"

PREFIX="file-prefix"

CONTAINER="container-name"

EXCLUDE_FOLDER="exclude-subfolder"

# Optionally as a first step

# List all file inside container container-name/subfolder

az storage account keys list --resource-group $RESOURCE_GROUP --account-name $ACCOUNT_NAME --query '[0].value' -o tsv | \

xargs -I {} az storage blob list --account-name $ACCOUNT_NAME --account-key {} --container-name $CONTAINER --prefix subfolder- --query "[?name][].name" -o tsv | grep -v '/$EXCLUDE_FOLDER/'
#!/bin/bash
RESOURCE_GROUP="grp-name"
ACCOUNT_NAME="acc-name"
PREFIX="file-prefix"
CONTAINER="container-name"
EXCLUDE_FOLDER="exclude-subfolder"
# delete all file with prefix file-prefix inside container container-name/subfolder
az storage account keys list --resource-group $RESOURCE_GROUP --account-name $ACCOUNT_NAME --query '[0].value' -o tsv | \
xargs -I {} az storage blob list --account-name $ACCOUNT_NAME --account-key {} --container-name $CONTAINER --prefix $PREFIX- --query "[?name][].name" -o tsv | grep -v '/$EXCLUDE_FOLDER/' | \
xargs -I {} az storage blob delete --account-name $ACCOUNT_NAME --account-key $(az storage account keys list --resource-group $RESOURCE_GROUP --account-name $ACCOUNT_NAME --query '[0].value' -o tsv) --container-name $CONTAINER --name {}Working with Azure Databricks
Access blob data
After cloning the data, we need access the data.
1 - Setting up KeyVault
az storage account keys list -g groupName -n groupname

# An example

az storage account keys list -g contosoResourceGroup5 -n contosoblobstorage5
# Create a Key Vault -- for secret setting purpose after
az keyvault create --name contosoblobstorage5 --resource-group contosoResourceGroup5 --location southcentralusUsing contosoKeyVault10 as example provided on the Azure documentation
 # Create the secret

az keyvault secret set --vault-name contosoKeyVault10 --name storageKey --value "value of your key1"
2 - Create Scope on Databricks backed by Azure, go to the link, follow the steps and create scope. Note that this only need tobe created once, there can be multiple secrets under the scope
https://'adb-instance'#secrets/createScope
To get the below info,
Go to Azure Portal > Home > Subscription > my sub = MS Enterprise > Resources under Settings >
find your keyvault under resources > Properties under setting
- Scope Name = dbutils.secrets.get(scope = "<scope-name-in-databricks>", ...)
- DNS name = Vault URI
- Resource ID = Resource ID
3 - Configure databricks cli
We need to obtain an access token first
Go to user setting -> access token -> generate token
databricks configure --tokenurl = https://'your-adb-instance'.azuredatabricks.net/
token = The token obtained above
4 - Working with Databricks cli
# check scope created

databricks secrets list-scopes
# List secret in a given scope
databricks secrets list --scope <scope-name>To create secrets under scope, in this case our secret name is storageKey
az keyvault secret set --vault-name contosoKeyVault10 --name storageKey --value "<your-key>"

az keyvault secret show --name "storageKey" --vault-name "contosoKeyVault10" --query "value"
# Extra - if we want to set a secret key with creds on a local folder
az keyvault secret set --vault-name contosoKeyVault10 --name gsaPrivateKey --file "/your/file/path/gcp_key.txt"# Extra2 - Delete secret under a keyVault
az keyvault secret delete --vault-name contosoKeyVault10 --name gsaPrivateKey# if fail to run secret set, re-run the below
az storage account keys list -g contosoResourceGroup5 -n contosoblobstorage5
az account set --subscription <subscription-id>
az keyvault secret list --vault-name contosoKeyVault10Create ADB Secrets Scope backed by Databricks
databricks secrets  create-scope --scope scope-name

# To verifiy has the scope created successfully

databricks secrets list-scopes

# Create secret in the scope

databricks secrets put --scope scope-name --key secrete-name

# Then it will pop up a .txt window, paste the secret value there and type `:wq` to save(write) and quit

# Verify secrets has added successfully

databricks secrets list --scope scope-name

# Verfiy my ACL access of the scope

databricks secrets get-acl --scope scope-name --principal email@email.com

# Give permission to other

databricks secrets put-acl --scope scope-name --principal email@email.com --permission READ
5 - Accessing blob data in Azure Databricks
Finally, after all the set up, we can now try access our data from the storage.
Reading the data into a Spark DF - execute the below in a databricks notebook cell

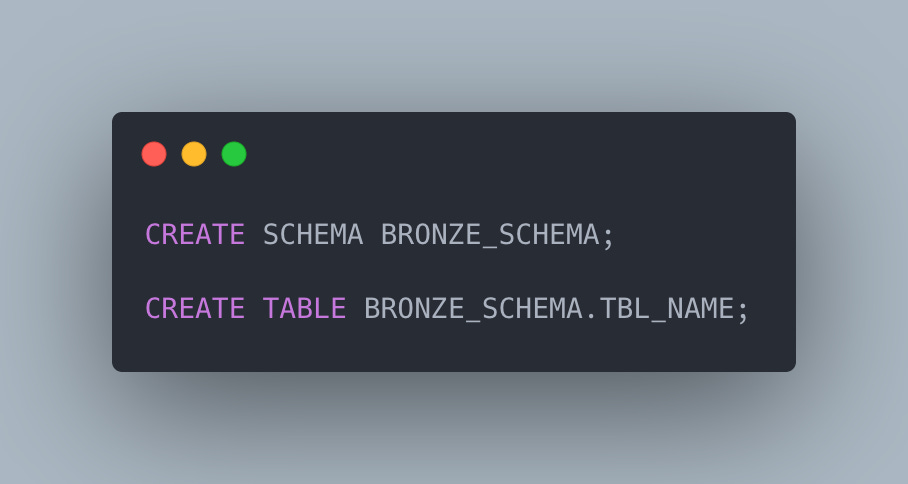
We can also create a table in Azure Databricks from storage data.
To do so, we will first need a SAS Token
# To get SAS Token

az storage container generate-sas \

    --account-name <account-name> \

    --name <container-name> \

    --permissions acdlrw \

    --expiry 2023-09-23T00:00Z \

    --auth-mode login \

    --as-user
Note of permission parameter
--permissions
The permissions the SAS grants. Allowed values: (a)dd (c)reate (d)elete (e)xecute (f)ilter_by_tags (i)set_immutability_policy (l)ist (m)ove (r)ead (t)ag (w)rite (x)delete_previous_version (y)permanent_delete. Do not use if a stored access policy is referenced with --id that specifies this value. Can be combined.
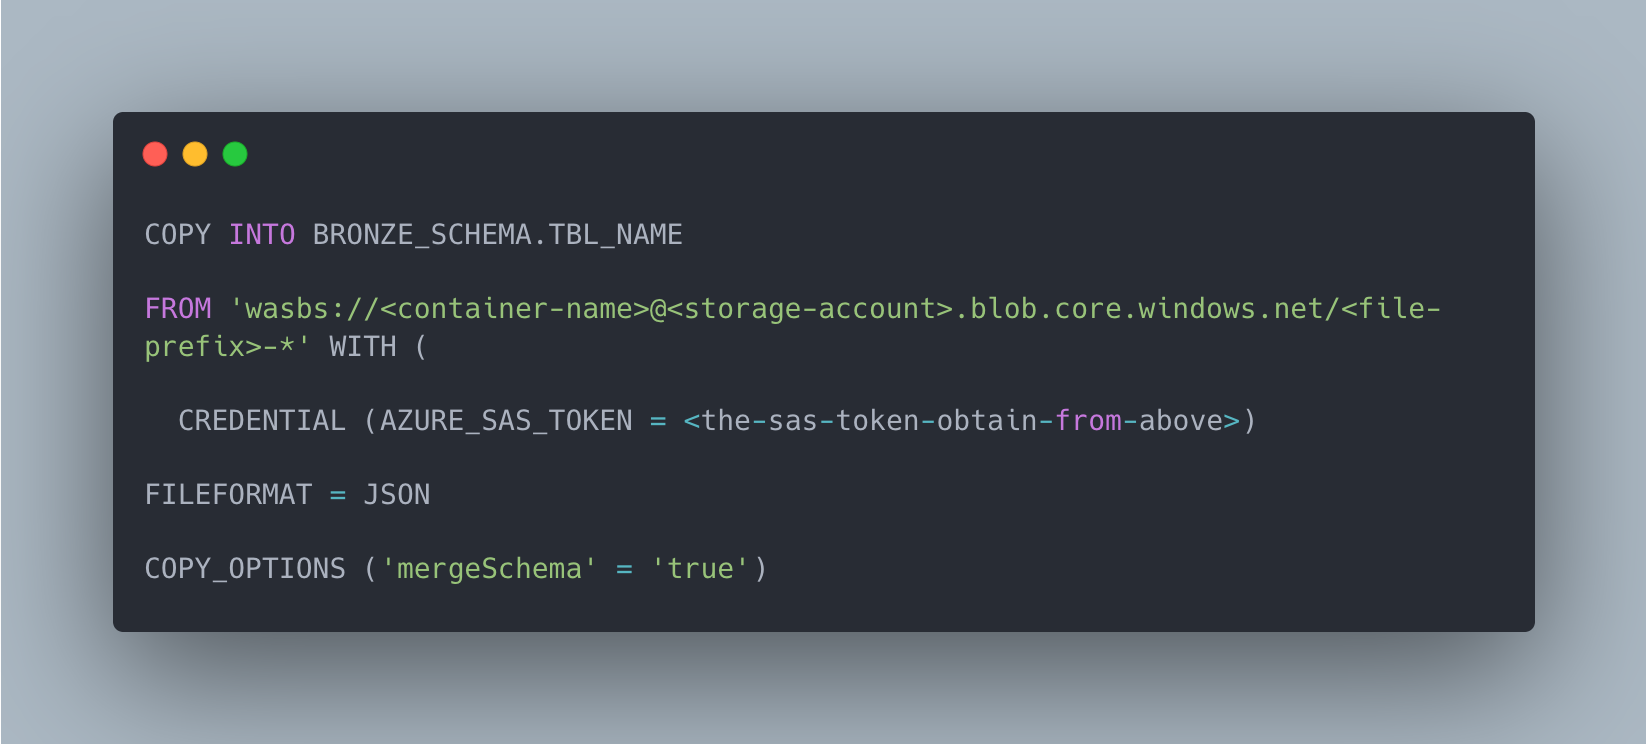
Then we can load the data to the destination table.
Loading from json
Loading from csv
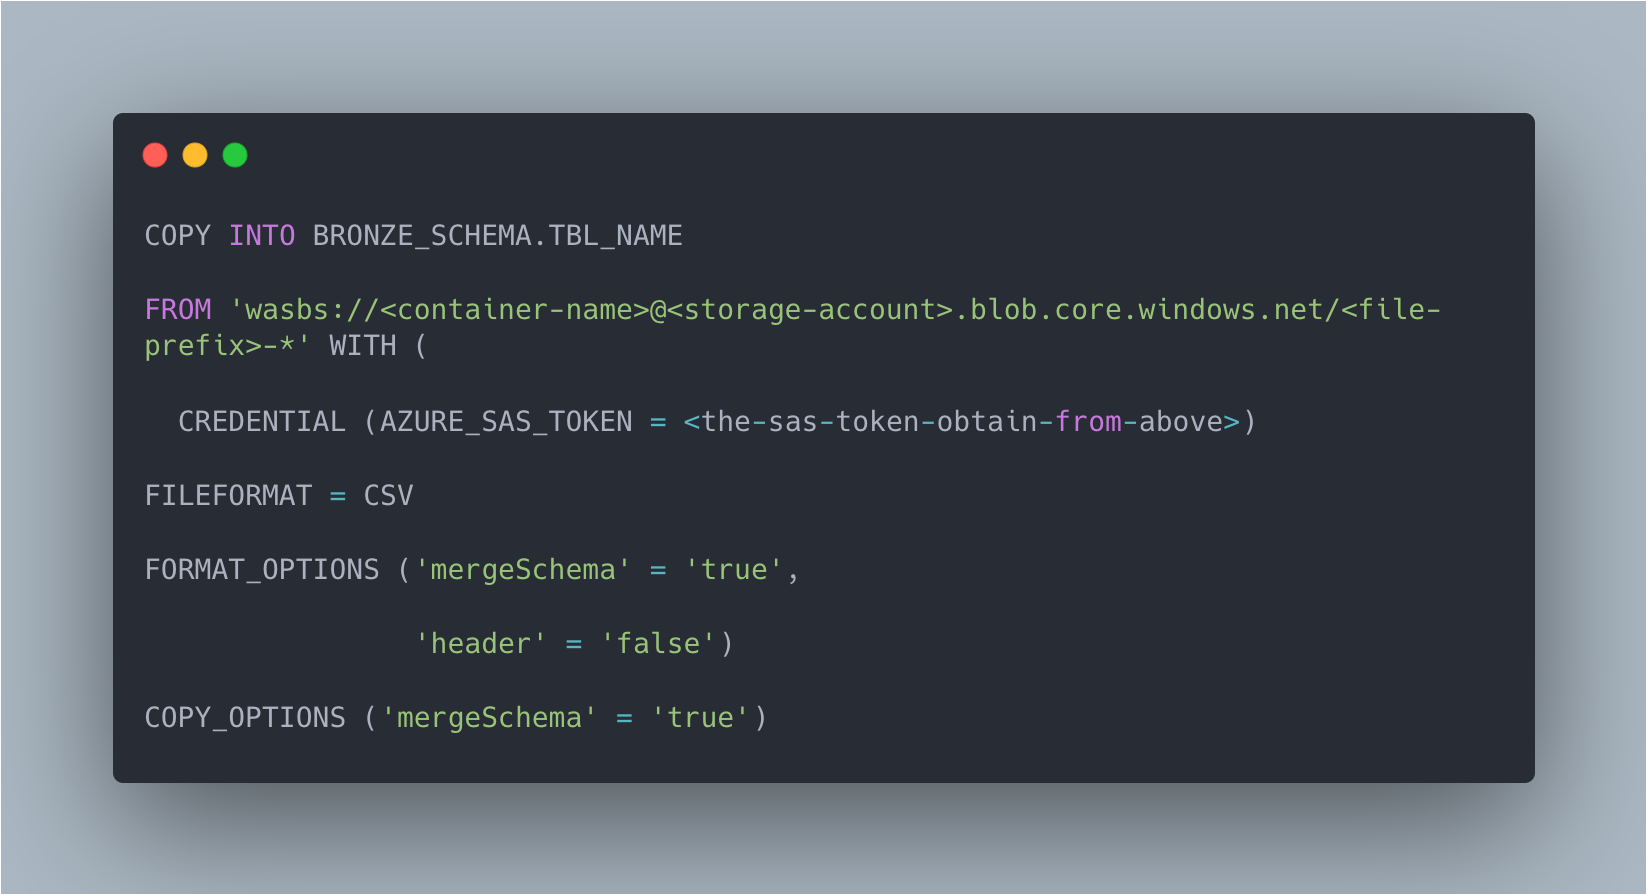
Depending on the above format options for headers, col. name might need to be adjusted

5 - Configure spark cluster so that it can connect to GCS Bucket
spark.databricks.delta.preview.enabled true

spark.hadoop.google.cloud.auth.service.account.enable true

spark.hadoop.fs.gs.project.id <gcp-project-id>

spark.hadoop.fs.gs.auth.service.account.private.key {{secrets/<adb-scope>/gsaPrivateKey}}

spark.hadoop.fs.gs.auth.service.account.email <svc-acc>@<gcp-project-id>.iam.gserviceaccount.com

spark.hadoop.fs.gs.auth.service.account.private.key.id {{secrets/<adb-scope>/gsaPrivateKeyId}}

spark.hadoop.fs.azure.account.key.{account}.blob.core.windows.net {{secrets/blobStorageScope/storageKey}}

PYSPARK_PYTHON=/databricks/python3/bin/python3
Reading data from cloud storage (GCS bucket/ Azure Blob) - execute the below in a databricks notebook cell

Saving Spark DF to GCS - execute the below in a Databricks notebook cell

Saving Spark DF to Azure Blob

Write the DataFrame as a single JSON file to Azure Blob Storage

Save df as a delta table in Databricks

6 - Inserting Data into Databricks using Python
One of the good thing I like about Databricks' python connector is that it allows to bulk load as much data as I want, and snowflake's connector has a limit of 16384.

Applying the above knowledge and the lessons I've learnt
Background:
I have to migrate large amount of sensor data to Databricks.
Initially, I plan to migrate the data as the below steps.
1. Move data from GCS to Azure Container
2. Execute the COPY INTO command in Azure Databricks to load the data into delta table
So ideally, the steps is running the below in terminal
azcopy login

azcopy copy 'https://storage.cloud.google.com/<bucket-name>' 'https://<storage-account>.blob.core.windows.net/<container-name>' --recursive=true
Then in Azure Databricks Notebook, execute the below

However, when I executed the above in databricks, it returned the error messages
IllegalArgumentException: 'java.net.URISyntaxException: Relative path in
absolute URI: sensor-data-2024-01-01 00:00:00.000'
After some googling and the help from ChatGPT, I realised the issue is with naming of those json files, mainly due to the whitespaces.
Then on stackoverflow, I found this post, so I tried something like this

But I am still getting the same error message. I finally realised that as long as I am trying to load my files using regex expression, it will failed because of the naming. That means, if I execute the below, the file will be copied successfully.

It is when I tried to bulk load everything using regular expression, the execution will fail.
Some approaches we can take to tackle this is,
1 - rename all of the file using azcli

2 - Or we can leverage `gsutil` to rename the file on the GCS side then use azcopy to move the file back to Azure and load into Databricks


And load the properly named files into Azure as a last step.

However, this is unnecessarily lengthy, as the data have to travel across multiple cloud and likely different regions, it will be costly. Also if the GCS storage is not hot sotrage, it will be even more costly to copy, rename and move acorss cloud.
So, in this case, a more direct way to load these sensor data into databricks is by the below steps.
1 - Unload data from Snowflake to GCS
Execute the below in Snowflake

2 - Read data from GCS to Azure databricks directly
Make sure cluster is configured properly
spark.databricks.delta.preview.enabled true

spark.hadoop.google.cloud.auth.service.account.enable true

spark.hadoop.fs.gs.project.id <gcp-project-id>

spark.hadoop.fs.gs.auth.service.account.private.key {{secrets/<adb-scope>/gsaPrivateKey}}

spark.hadoop.fs.gs.auth.service.account.email <svc-acc>@<gcp-project-id>.iam.gserviceaccount.com

spark.hadoop.fs.gs.auth.service.account.private.key.id {{secrets/<adb-scope>/gsaPrivateKeyId}}

spark.hadoop.fs.azure.account.key.{account}.blob.core.windows.net {{secrets/blobStorageScope/storageKey}}

PYSPARK_PYTHON=/databricks/python3/bin/python3
And finally, if we need to grat user access to external file system to avoid insufficient priviledges, the below commands are needed to be executed as admin.

That's it for now, hope you found this helpful.
Thank you for reading and have a nice day!
This post is originally published on my blog
Before you leave
If you have any questions and want to discuss further, please leave a comment.
It might take you a few minutes to read the article, but it took me days to create quality content to share. I’d greatly appreciate it if you consider subscribing to receive my work.